Lemon Tea Cookies

I made this recipe* for the first time this week and I really loved it.  The cookies were simple to make, inexpensive and pantry-friendly (meaning I didn’t have to buy a laundry list of specialty items for one single recipe).  Most of all, they taste great for any season of the year; light and refreshing to beat the summer heat and the brightness of the lemon give’s one hope for warmer weather in the dead of winter.

They’re delicious plain or you can mix up a glaze of confectioner’s sugar, lemon juice and wee bit of vanilla extract to dip them for extra flavor and eye appeal.

Link for printable recipe: Lemon Tea Cookies Recipe Card

Notes:

I made the batter with a handheld electric mixer and a medium-size mixing bowl.  As always, I take a few extra minutes to prep my ingredients.  Make sure the butter has had time to naturally soften at room temperature.  It will make mixing a lot easier.

As I always do, I created a “Mise en place” (French for “putting in place”).  This is one of the best ways to “error proof” yourself and save lots of frustration.  There’s nothing worse than watching something bake and realizing you forgot to add baking powder or some other key ingredient.

Lemon Tea Cookies Mise en place

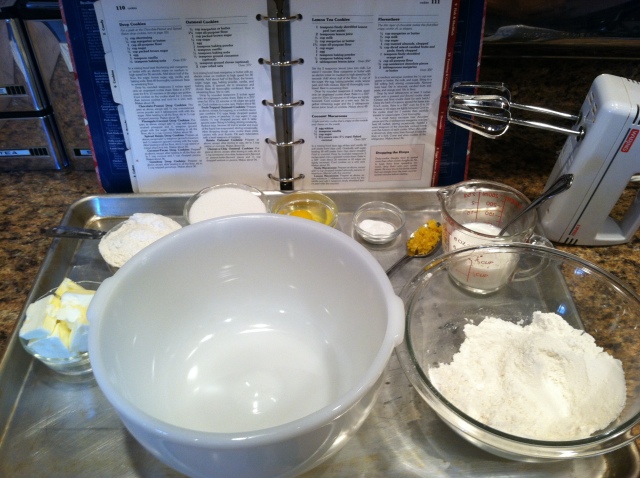
Prepped ingredients, in order of addition from left to right.  The baking powder, baking soda and salt are combined.  In the background is my Better Homes and Garden cookbook that I adapted the recipe from (see footnote below).

Recipe Yields about 48 cookies

Ingredients

2 tsp. lemon juice
1/3 cup whole milk

½ cup butter (room temperature)
1 ¾ cup all-purpose flour
¾ cup sugar
1 egg
1 tsp. baking powder
½ tsp. baking soda
1 tsp. grated lemon peel
¼ tsp. salt

Optional glaze:

2 Tbsp. lemon juice
1 cup confectioner’s sugar
1/8 tsp. vanilla extract

 Instructions:

  1. In a small bowl, combine the lemon juice and milk. Set aside.
  2. In a mixing bowl beat the butter 30 seconds until smooth, beat 1 cup of the flour, the sugar, egg, baking powder, baking soda, salt, and lemon peel.
  3. Add the milk mixture, remaining flour and beat until thoroughly blended.
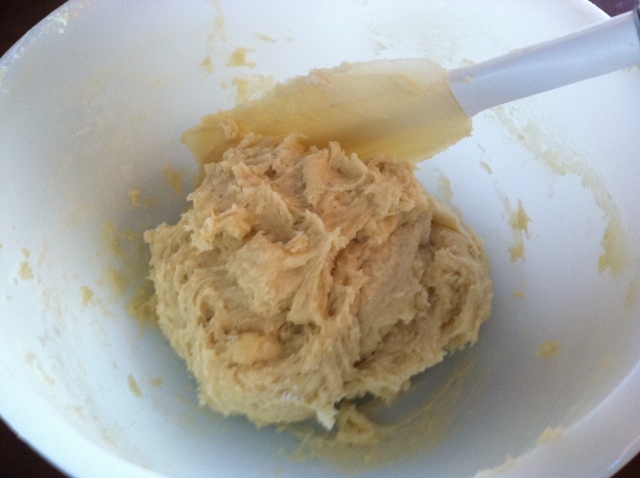
    Lemon Tea Cookie dough

    The finished dough

  4. Drop by rounded teaspoons onto an non-greased baking sheet, spacing 2” apart.

    Lemon Tea Cookies dough going on baking sheet

    A small scoop would work great, too.

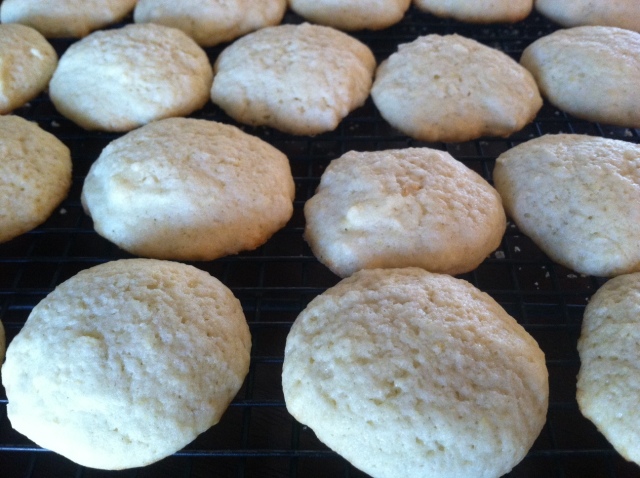
  5. Bake @ 350F, 10-12 minutes or until the edges are lightly browned.
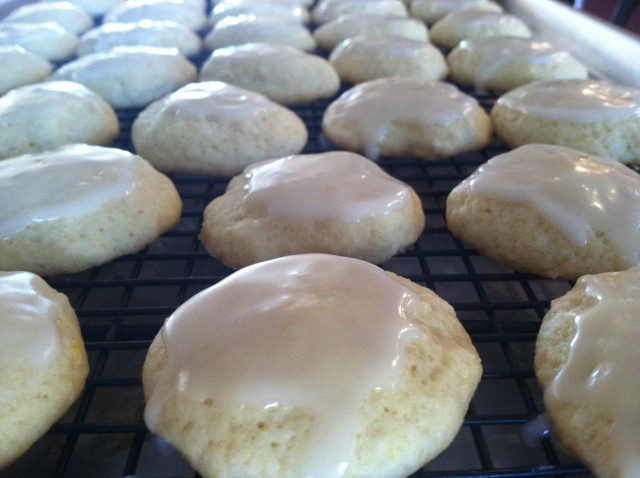
  6. Cool the cookies on a wire rack.
    Lemon Tea Cookies cooling after 1st bake
  7. Eat plain or make the optional glaze. To make the glaze, mix the lemon juice, confectioner’s sugar, and vanilla extract in a bowl.  Dip the cooled cookies, one at a time, just enough to coat the cookie tops. Set on wire rack until glaze hardens.
    Lemon Tea Cookies on cooling rack after glazing

 8. Enjoy!


*Recipe is adapted from “New Cook Book” by Better Homes and Gardens® copyright 1989 by Meredith Corporation p.111


Posted in Uncategorized | Tagged , , | 4 Comments

Shrimp Étouffée

Slide1

It’s a challenge to be a shellfish lover living in the Midwest, where finding good-quality and reasonably-priced seafood at the local markets is not common.  When I can find a deal on wild caught shrimp or lobster, I will occasionally purchase.  So, when I have some on hand, I want to make it somewhat special and appreciate it.  This week, I spotted some frozen Gulf shrimp, and I remembered a cookbook on my bookshelf that contained a recipe for Louisiana Étouffée, the classic dish of smothered shellfish served over rice.

I flipped open the pages to Emeril Lagasse’s 1996 book titled “Louisiana Real and Rustic”. I found the recipe and began a short list of ingredients to get ready for a meatless Friday dinner.  With a little further reading and thought, I decided to make a couple of modifications to it.  First, I made a quick shrimp stock from the shrimp shells, rather than using plain water as the original recipe called for.  I wanted to address the fact that I am often confined to using frozen shrimp from a chain store and wanted to try to get as much flavor out of those shrimp as I could.  Second, I added a teaspoon of paprika to enhance the sauce a bit and removed ½ teaspoon of salt.   Other than that, I have left this recipe alone.    It yields a lot of flavor with very simple ingredients.  To me, that is exactly what home cooking is all about.  Bon Temps!

Ingredients:

2 cups chopped celery
2 cups chopped onions
2 cups chopped green bell pepper
2-3 tsp chopped garlic

6 ounces unsalted butter

2 pounds medium shrimp, peeled and de-veined

2 Tbsp. flour
1 tsp salt
½ tsp cayenne pepper
1 tsp paprika

2 cups shrimp stock* or plain water

6 Tbsp. chopped parsley
½ cup chopped green onions

Ingredient prep:

Etouffee Mise En Place for dry and butter

Mise en place, “everything in its place”. (Shrimp and stock not shown here).

Chop the “trinity” of celery, onions, and green bell pepper.

Chop the garlic.

Combine the flour, salt, cayenne, and paprika in a bowl.

Chop the parsley and green onions.

Measure out the butter.

(I lay everything on a sheet pan next to the stove in order of addition):

Etouffee Order of Addition

Instructions:

Melt the butter in a large skillet on medium heat.

Add the “trinity” of celery, onions, and bell pepper.  Saute on medium heat for 10-12 minutes or until tender.

Add the garlic, stirring frequently, for about 2 minutes.

Add the shrimp.  Cook until pink, about 4-5 minutes.

Etouffee shrimp added

Combine and whisk the stock/water with the flour/salt and cayenne mixture, then add to the skillet.  The sauce will start to thicken.  Reduce heat to medium-low and simmer for 6-8 minutes.

Etouffee Thickening sauce

Taste the sauce.   Adjust seasonings to your liking.

Add the parsley and green onions.  Cook another 1-2 minutes.

Etouffee green onions are added

Serve over rice.

Etouffee served over rice

Ladle over some cooked white rice. Add a little extra green onions and parsley. Enjoy!

Notes and References

*About the stock: I purchased Shell-On Shrimp.  I made a simple stock ahead of time by peeling and deveining them and returning them to the refrigerator.   The shells were combined with 1.5 quarts of water, ¾ tsp of salt, a pinch of black pepper, 1 bay leaf, ¼ cup rough chopped onion, and ¼ cup rough chopped celery.  The pot was simmered for about 45 minutes and the stock strained.  Extra stock can be frozen for later use.

Recipe adapted from Louisiana Real and Rustic, by Emeril Lagasse, William Morrow Publishers, New York, 1996

#Bam!

BAM

The photo taken when Emeril signed our copy of “Louisiana Real and Rustic”, sometime in late 1990’s.

Posted in Uncategorized | Tagged , , | 1 Comment

Making a Traditional Irish Soda Bread

Slide1

Whether made once per year to celebrate St. Patrick’s Day or enjoyed as an “everyday” bread, Irish Soda Bread is great to have in our arsenal of recipes in the home kitchen.  I’ve been making it for several years now, enjoying its wonderful simplicity and the pleasure of keeping an old tradition alive.

I’ve purposely titled this post “Making a Traditional Irish Soda Bread” because although there are variations in both the type of flour used and exact cooking methods, Traditional Irish Soda Bread is made with only 4 ingredients (flour, buttermilk, salt, and baking soda).  Other versions may include ingredients like sugar, raisins, butter, or currants. To traditionalists, such as the Society for the Preservation of Irish Soda Bread, the addition of those items would constitute making a “Tea Cake”, not a “Bread”.

Irish Soda Bread is a Quick Bread by definition, leavened by baking soda, not yeast or eggs, with no “rise time” required. The chemistry for the leavening takes place between the buttermilk and the baking soda, which work together to form a gas. Knead very lightly, just enough to get a dough ball to form.  As soon as the dough is mixed, it is ready to go into the oven.  Do not overwork, as doing will make the bread too dense.   This wonderful video clip from the old Julia Child program is an excellent reference!

With the use of bread flour (which I use in all of my baked breads), I find it important to measure to 16 oz. by weight, not volume.   If using All Purpose Flour, measuring out 4 cups by volume works fine.  As with any bread, if the mixture is too dry, a little extra buttermilk may be added.

I do hope you enjoy this and find yourself making this all-year round.

Ingredients:

16 oz. (by weight) Bread Flour
14 oz. Buttermilk (Sour Milk* may be substituted)
1 tsp. baking soda
1 tsp. kosher salt

Instructions:

  • Preheat an oven to 450F.
  • Combine 16 oz. bread flour, 1 tsp. baking soda, & 1 tsp. kosher salt in a large, wide bowl.  Stir to disperse well.
  • Add 14 oz. of buttermilk.
  • Hand mix until a sticky ball forms, transfer to a floured surface and form into a round loaf shape, about 8″.
  • Transfer to a lightly floured baking sheet or cast iron skillet
  • Make a cross-cut with a knife (it’s tradition!)
  • Bake 15 minutes at 450F
  • Lower temperature to 400F. Bake for another 20 minutes. The bread should sound hollow when tapped on its bottom.
  • Remove from the oven and cool on wire rack.
  • Slice and Enjoy!
Slide2

An abbreviated recipe with reference pictures.

*Sour milk may be made by pouring 2 tbsp of vinegar or lemon juice in the bottom of a 2 cup measure and pouring 16 oz. of milk over it.  Let sit for 10-15 minutes.  (Truth be told, I’m pretty frugal, and often make my own sour milk for my Irish Soda Bread).

Sources:

The Society for the Preservation of Irish Soda Bread: http://www.sodabread.info/

Julia Child makes Irish Soda Bread: https://www.youtube.com/watch?v=RUnkKA2xzZQ

Mummy’s Brown Irish Soda Bread from Darina Allen: http://kerrygoldusa.com/recipe/mummys-brown-irish-soda-bread-from-darina-allen/

Posted in Breads, Irish Soda Bread | Tagged , , , | Leave a comment

Homemade Tomato Parmesan and Herb Crackers

Slide1

This is more than a recipe post.  It’s a small epiphany about why making homemade crackers is a great way for home cooks to learn (or improve) key techniques in the kitchen.

I’ve become hooked on making these.  I’ve been making small batches, a couple of times a week. I’ve been playing with different flavors.  I’ve been wondering if this is something I should even post here.  I’ve been thinking that perhaps people would find the thought of making crackers at home to be a waste of time, given that there is such a wide variety at any grocery store.  Who would take the time to make crackers?  So, I originally decided not to share this.  Then, something started to change my mind.

I found myself making a better quality cracker each time.  Each batch got easier to make than the previous one.  I was getting better at other baking and dessert making techniques.  This was becoming fun.  I realized that the basic techniques here are transferable to many other foods in the home kitchen: preparing a basic dough, rolling pin techniques, and making consistent cut-outs.  These are all needed for making breads, cookies, pie dough, pastries, and pasta.

This recipe is a bit unique. It uses tomato sauce as the primary liquid. Use a puree-style sauce (no chunks).  A quality tomato puree would work great.  I also stuck with traditional butter for the fat.  I tried olive oil to be healthier, but found the crackers got too crisp and dull tasting.  I have used both All-Purpose and Whole Wheat flour.  For me, the Whole Wheat is easier to work with and the taste is more rustic.  If your dough is too tacky, cut a little more flour in.  Likewise, if it is too dry, you can add a bit of water.  When it rolls out it should not stick too the surface or the rolling pin.

Please remember, as with any fresh bread, cake, or other baked item, there are no preservatives here.  These will only last for a couple of days.  I actually cut this batch in half most of the time (as I am the only one eating them).  But, for a family, I would think these will disappear really quickly!

PS, I think your kids would have a ball making these with you!

Slide1

Posted in Uncategorized | Tagged , , , | 1 Comment

Oven-Baked Home Fries

Oven Baked Home Fries

Why put a blog post up about something as simple as oven baked home fries?  They are definitely NOT the most glamorous food to discuss.  However, I’m willing to gamble that there are people just like me who will read this.  We all have busy lives, we’re all watching our money, we’re all conscious of what we eat, and we often get “stuck” for food ideas.  So, for people like us, simple foods like this are, in fact, interesting to talk about.  The bottom line is, we all have the same challenge as we sit down to prepare a menu for the week, plan a grocery list, or (worse yet), wander through the grocery aisle, trying to come up with a variety of menu ideas for ourselves and our families.   So, for people like us, it’s often these “back to basics” dishes and sides that really make a difference in a home kitchen.  So, with that said, let’s make some home fries!

These home fries are baked, not fried, simple to prepare, require minimal prep work, and can be paired up with sandwiches, hamburgers, hot dogs, steak, eggs and bacon, or any protein dish.  The preparation is really simple, but there are a couple of tricks worth noting to get better consistency.  (All credit for this goes to my lovely wife!  Yes, I do a lot of cooking at home, but she has a lot of specialties in her own right.)

Tip #1: Soaking and rinsing the potatoes helps to remove extra starch, which makes for crispier potatoes.  There is another side benefit as a result, as this also reduces the amount of carbohydrates in the potato.

Tip #2 Preheating the baking sheet helps to get the potatoes cooking quickly.

Over the years, we’ve put different seasonings of all kinds, but in the end, we have ended up with a simple seasoning of seasoned salt and pepper.   But feel free to experiment!


Ingredients:

4 to 4 1/2 cups peeled and cubed Russet potatoes (about 1/2″ cubes)
1 1/2 Tablespoons Canola Oil
1/8 teaspoon ground black pepper
1/2 teaspoon Lawry’s Season Salt (or a substitute).

Instructions:

1. Place non-greased sheet pan onto center rack of oven.
2. Preheat oven to 425F
3. While oven is preheating, peel and dice the potatoes.
4. Soak the potatoes in a bowl of cold water for about 10 minutes.
5. Rinse them well under running water.
6. Dry them well with a dish or paper towel.
7. Toss them with the canola oil in a bowl.
8. Season with the salt and pepper.
9. Remove the hot baking sheet from the oven.
10. Spread in a single layer.
11. Bake for 45 minutes.
12.  Enjoy!

Crispy Oven Fries what a classic look

Posted in Baked Home Fries, Oven Baked Home Fries, Potato Ideas | Tagged , , , | Leave a comment

Easy Homemade Meatballs

Every home kitchen should have a basic recipe for meatballs.  So, in case you don’t have one, here is mine.  To be honest, this is one of those dishes that I’ve made for years, but never the same way twice.  So, over the past several months, I’ve made a couple of batches in my best “test-kitchen” mode, to capture the best version to share with you. I ended up with this “no-frills”, easy recipe that I think you’ll enjoy.

This makes more than 3 pounds of meatballs, so feel free to halve it if you don’t want to make such a large quantity.  I find it easier to make a larger batch and freeze some for later use, as I’m usually cooking for just 2 of us.  However, for larger families or entertaining, I think this is perfect.
 
The dry pantry is our friend here, supplying the seasonings and bread crumbs. No chopping or grating here, just measure the seasonings, break a couple of eggs, unwrap the meat, hand mix everything, measure out the meatballs, and bake.  
 
Remember not to overwork the meat, less handling is better. Salt is kept to a minimum, because the Parmesan cheese will take care of that. And, if your squeamish about getting your hands in that bowl, a pair of disposable gloves is your friend too!  
 
(Here, I give instructions for finishing the meatballs in your favorite marinara sauce.  You could also bake them, cool, and freeze in plastic freezer bags for finishing at a later time.)
 
 
Prep time = 20 minutes
Bake time = 60 minutes 
Makes approximately 2 dozen, 2 oz. meatballs 
Additional “sauce time” 3-4 hours
  
Ingredients:
2 lb. ground beef
1 lb. Italian sausage
2 eggs
1 cup plain bread crumbs
2/3 cup grated Parmesan cheese
2 tsp garlic powder
1 tsp onion powder
2 tsp Italian seasoning
½ tsp ground black pepper
¼ tsp kosher salt

All the seasoning and cheese are in the upper left.   Bread crumbs upper right.
Instructions:
Lightly grease a baking sheet and preheat your oven to 400F.
 
Measure all dry ingredients.   
Add the beef, sausage, and eggs to a large mixing bowl.
Add the dry ingredients.
With your hands, mix everything well. 
Weigh out into 2 oz. portions and roll into balls.  Place on sheet pan.
 
One of my favorite garage sale finds!
It might seem a tad tedious to weigh them out, but the result is very uniformly-sized meatballs.  
Bake for 60 minutes.  With a thermometer, check internal temperature.  160 to 165F is the target temperature.  
 
 
After the meatballs are baked, drain them on some paper towels to remove excess grease.  Then, move them to a pot containing 7-8 cups of marinara sauce on low on the stove top or in a crock pot for 3-4 hours.  
3-4 hours in a crock pot or a low simmer on the stove top is perfect.
Once ready, the options are wonderful!   Put them on Spaghetti or your favorite pasta, inside a Sub, or cut into cubes on Pizza!   Well, that’s how we made use of all of our “test-kitchen” runs the past couple of months.  
 
Cubed, sitting atop a sheet pan pizza….


We celebrated #NationalTortelliniDay with these….


How about a Meatball Sandwich?


I do hope you enjoy this recipe!  Thank you for stopping by!  
Posted in Homemade meatballs, Meatball pizza, Meatball recipe, Meatball sandwich, Spaghetti and Meatballs | Tagged , , | 3 Comments

Celery and Feta Salad

It can be a bit challenging to get healthy salads in a Midwestern United States winter.  Yes, lettuce and veggies are available, but let’s be honest, they’re not always the best value for the dollar.  It’s understandable given the time of year.  This salad makes use of hardy winter ingredients, while being healthy and delicious!  It’s easy to prepare and inexpensive.  This will serve 2 filling lunch salads.

I choose to peel the celery, especially in the winter time.  The ribs can be quite stringy, which would make the salad rather unpleasant to eat.  Also, slicing the celery on a bias (angle) makes the presentation look great.

There are a variety of flavors for feta cheese on the market.  So, be sure to experiment with different flavors if you wish.  The recipe calls for 3 ounces.  If you wish, you can cut back that amount.

I definitely recommend toasting the walnuts for about 10 minutes in a 300 degree oven.  It brings a whole new flavor to the walnuts!  If you wish to skip that step, everything will still turn out great.  You can also replace with other types of nuts.

Lastly, I garnish with a few dried cranberries.  The sweetness balances very nicely with the savory flavor of the salad.

Hope you enjoy this!

Recipe

Ingredients:

2 cups, peeled and thinly sliced celery
4 oz. crumbled feta cheese
3 oz. walnuts (toasted)
1 Tbsp. chopped red onion
3 Tbsp. Red Wine Vinaigrette

Prep all ingredients.  Toss together and serve.  Enjoy!

Posted in Celery salad, feta, healthy salad, winter salad | Leave a comment

Pepper Jam Onion and Bacon Dip

c2dc0-img_2545

If you love Pepper Jam, this is for you.

Recently, I came up with this very simple recipe.  Although my local jam supplier makes a very unique Red Onion Chipotle jam, you can substitute a suitable purchased or homemade onion jam.  The jam that I use here has some chipotle pepper “kick”, so adding a little pepper seasoning to intensify the heat to your liking would be a reasonable addition if you’re using a plain onion jam.

Recipe:

This is  just a simple combination of softened cream cheese, jam, and bacon.  3 ingredients mixed together in a bowl with some chips on the side.  How can you beat that?

Ingredients:

8 oz. softened cream cheese
4 oz. onion jam (or your favorite flavor)
3-4 strips of cooked and diced bacon

Combine everything in a bowl.  Garnish with sliced green onions or chopped red onion.  Serve with your favorite crackers.  Enjoy!

Posted in Cream Cheese and Bacon, Onion Dip, Onion Jam, Red Onion Chipotle | Tagged , , , , | Leave a comment

Spicy Panko Chicken

A quick to assemble, baked version of spicy chicken.

Whether it’s Game Day or any busy week night, this is a recipe that I do hope you will go to often.  With only four ingredients, this is very easy to make and can be served in a variety of ways, making it very versatile.  Served as the protein accompaniment with vegetables and a starch, sandwiched in a kaiser roll with lettuce and tomato, or as a stand-alone game time snack, this will please almost any crowd.

Boneless chicken thighs are marinated in hot sauce, coated with a mixture of panko bread crumbs and olive oil, then baked until done.  It’s that simple; no laundry list of spices, no dredging, no deep-frying, nor any messy clean-up is required! Marinating the chicken in hot sauce provides the heat and flavor.  You can always add a little extra dry spice if you want to kick it up!

Makes 8 servings

Ingredients:

2 to 2 1/2  pounds boneless chicken thighs
5 oz. hot sauce of your choice
8 oz. (by weight) panko bread crumbs ( ~3 cups by volume)
1/2 cup olive oil

Instructions:

4-5 hours before mealtime, place the chicken in a bowl, add the hot sauce and mix to make sure it’s evenly coated.  If the thighs are large, you can cut into smaller pieces.

Cover with plastic and refrigerate.

Preheat oven to 425F about 45 minutes before mealtime.

In a bowl, combine the breadcrumbs and light olive oil.  Use a fork to work the mixture well to coat all of the panko crumbs.  The oil will help to brown the breadcrumbs.

Dip each piece of marinated chicken into the breadcrumb mixture.  Make sure all sides are coated.  (The hot sauce helps the breadcrumbs adhere well).

Place all pieces onto a sheet pan.

Coated and ready for baking. Space well, using 2 pans if needed.

Cook in 425 oven until brown and chicken is cooked through, approximately 35 minutes.

Enjoy!

Leftovers can be frozen and reheated.

Posted in Baked Chicken, Panko Chicken | Leave a comment

Chicken and Mango Salsa Taco

I admit that I struggle to keep a healthy diet, more often than I would like to admit.  Although I do a really good job staying away from processed foods (cooking almost everything from scratch), I eat way too many carbohydrates and dairy products-especially my personal kryptonite-cheese.  So, finding healthy alternatives needs to be a higher priority. This taco is one such replacement.

The recipe:
I won’t waste effort to detail out specific quantities, as you should customize this to your liking, but here is how I prepare them:
I make these with mango salsa (recipe here), added to some cooked, pulled chicken meat, diced avocado, additional red onion, and chopped jalapeno, placed in a flour tortilla.  A couple of splashes of fresh lime juice, and I’m happy!  
The results:
The lightness of the fruit flavor combined with the hot pepper and onion satisfies my hunger without needing cheese and/or sour cream that I would normally load up on a regular beef-style taco.  I can enjoy several of these and not feel guilty when I walk away from the table, knowing that I just enjoyed a nice balance of carbs, fruits, and lean protein. 
You can easily substitute fish for the chicken, or use any kind of fruit salsa you prefer.  Pineapple is a great substitute if you can’t find mango.  Like any taco, customize yours to your own liking.  
And, as always, 
Enjoy!
Posted in Fruit taco, health alternative, Mango Salsa | Leave a comment